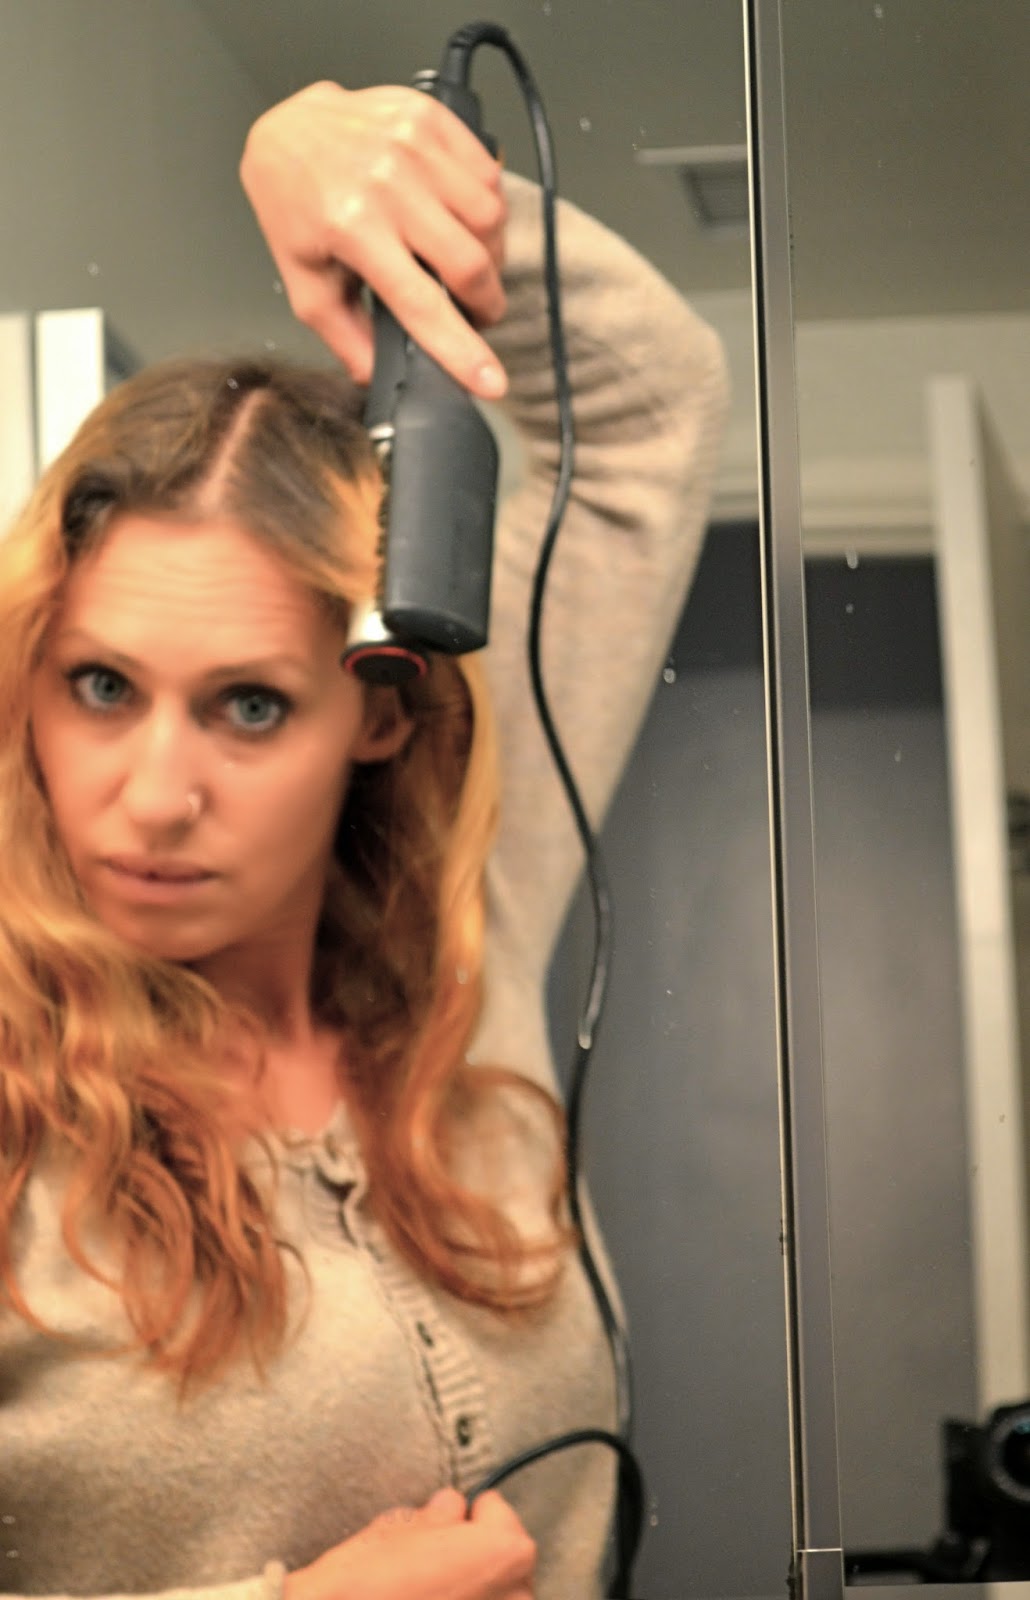
For the past several weeks I've been raving on Blogger, Twitter and Instagram about the Instyler Pro. Like many makeup artists working in film and TV, I get tasked with also doing hair about 30/40% of the time. So I'm delighted when a product comes along that not only shortcuts the time consuming process of hairstyling, but actually delivers on its promise to make it easy!
I'm going to add a little, morning honesty. Below is how I look when my day begins. That's my hair folks. And that's on a "not-so-bad", hair day. Yikes! Normally I'd have to flat iron out the frizz, then add flat iron waves or throw in my curling iron for volume, and probably use hot rollers for shine and height. But now that I have my instyler, (which simultaneously uses a flat iron barrel, a curling barrel, and a brush for smoothing, waving, curling, and polishing) I can use one tool to get it done. Here's how:
Step 1: Separate your hair into sections. I find 6-7 pieces is key. Left side top, left side bottom, right side top, right side bottom, back of the head, and the crown.
Step 2: Determine where you want the wave to go and in what direction. For beach waves that pull away from the face, hold the barrel facing straight downwards and curl the hair over and outward, making sure to clamp as close to the root as possible. (Note: For this look the brush must face forward and the iron to the back).
Step 3: Release the curl making sure that the ends are not clamped but remain out of the iron. This allows the waves a more natural finish. Don't finger comb. Let the wave sit and cool. Also, when creating beach waves it's important to "over-direct". In this case, clamp and push your barrel forward from the root to create additional volume.
Step 4: Wrap and secure hair with ends out. If you are getting towards the crown and the back of the head, you can shift the iron horizontally instead of vertically to get a natural lift on the top, back sections.
Step 5: Loosen the curls with fingers only. You can then shake out the hair and separate with a comb or pick.
Step 5: Use your fingers to move waves where you want them placed. Secure with a blast of light hold hair spray. For extra volume, add a little dry shampoo to the roots and shake upsidown. (For this look, I added no product as my hair was slightly dirty).
And there you are. California beach waves with natural volume, no fuss, and minimal product! All in 7-10 minutes.
The Instyler Pro is available at professional distributers across the country here.
With Love,
Noa B
I'm going to add a little, morning honesty. Below is how I look when my day begins. That's my hair folks. And that's on a "not-so-bad", hair day. Yikes! Normally I'd have to flat iron out the frizz, then add flat iron waves or throw in my curling iron for volume, and probably use hot rollers for shine and height. But now that I have my instyler, (which simultaneously uses a flat iron barrel, a curling barrel, and a brush for smoothing, waving, curling, and polishing) I can use one tool to get it done. Here's how:
Step 1: Separate your hair into sections. I find 6-7 pieces is key. Left side top, left side bottom, right side top, right side bottom, back of the head, and the crown.
Step 2: Determine where you want the wave to go and in what direction. For beach waves that pull away from the face, hold the barrel facing straight downwards and curl the hair over and outward, making sure to clamp as close to the root as possible. (Note: For this look the brush must face forward and the iron to the back).
Step 3: Release the curl making sure that the ends are not clamped but remain out of the iron. This allows the waves a more natural finish. Don't finger comb. Let the wave sit and cool. Also, when creating beach waves it's important to "over-direct". In this case, clamp and push your barrel forward from the root to create additional volume.
Step 4: Wrap and secure hair with ends out. If you are getting towards the crown and the back of the head, you can shift the iron horizontally instead of vertically to get a natural lift on the top, back sections.
Step 5: Loosen the curls with fingers only. You can then shake out the hair and separate with a comb or pick.
Step 5: Use your fingers to move waves where you want them placed. Secure with a blast of light hold hair spray. For extra volume, add a little dry shampoo to the roots and shake upsidown. (For this look, I added no product as my hair was slightly dirty).
The Instyler Pro is available at professional distributers across the country here.
With Love,
Noa B


No comments:
Post a Comment